Week 5 Lesson contains:
òWorking with Selections and Layers...
òUsing the Magnetic Lasso Tool
òLasso Tool to Create a Quick Mask Mode
òRelative vs Non-Relative Canvas Size
òCanvas Size the Magnetic Lasso Image
and Add to it the Quick Mask Image
òText, Blend Modes, Opacity
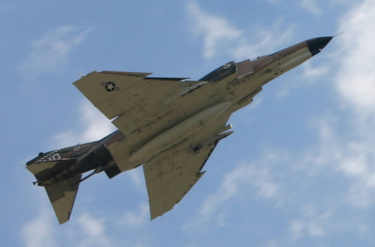
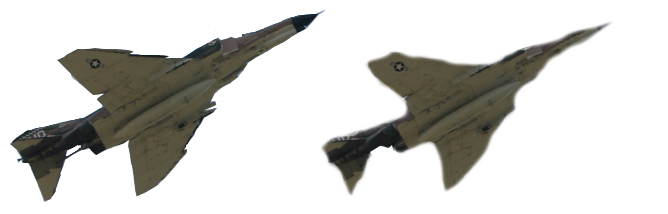
The airplane above to your right was tubed by using the Magnetic Lasso Tool.
This tool is like a magnet that connects automatically to the edges and
allows you to get rid of the background to the image...for some strange
reason this time I did a lousy job on using the magnetic lasso tool and
it didn't come out as smoothly as my flower in lesson 2???
I didn't understand the option settings and tried to get it to go in between
crevices but it had it's own mind as to wear it wanted to lead.
I will have to find out more on controlling
the Magnetic Lasso Tool.
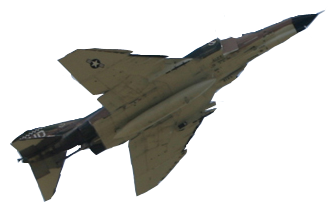
Lasso Tool to Create a Quick Mask Mode
The plane was created similar to the Magnetic Lasso Tool to get rid of
the background but instead of using the Magnetic Lasso Tool we used
the regular Lasso Tool and loosely went around the plane. Then using
the Quick Mask and taking the Brush Tool going around the airplane
is supposed to make the image better looking, however I found this
difficult and as you can see the plane looks horrible. This is
something that needs alot of patience and practice.
Relative vs Non-Relative Canvas Size

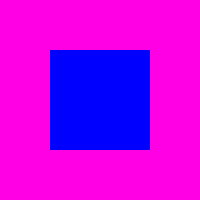
In the above image we learned how change the canvas size.
The original canvas was the blue middle...the image on your left
where I created the green area is using the Relative option
this means that the I am not restricted to putting in the numbers
that I want my canvas size to be in the width and height whereas the
image on your right when Relative is unchecked the numbers constrict
themselves, so for example the blue area was 100x100 pixels but I
wanted to increase the canvas to 200x200 pixels so what happens
is the new size locks meaning when I put in 200 pixels in the width the
height automatically adjusts to 200 pixels.
Another feature in the Canvas Size is you have the option to add-on
another color to your canvas.
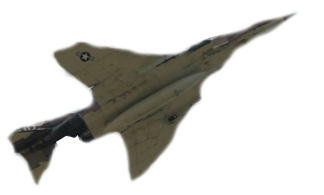
Canvas Size the Magnetic Lasso Image
and Add to it the Quick Mask Image
If you look above the two planes are one image...the original image size
had only the Magnetic Lasso plane on your left and the canvas was too
small for the Quick Mask plane on your right to fit, so we learned how
resize the canvas to be able to copy and paste the Quick Mask plane.
Now as for which one I prefer I would have to go with the Magnetic Lasso
plane until I can get a grip as to understanding and practicing the Quick Mask.
Text, Drop Shadow, Blend Modes & Opacity
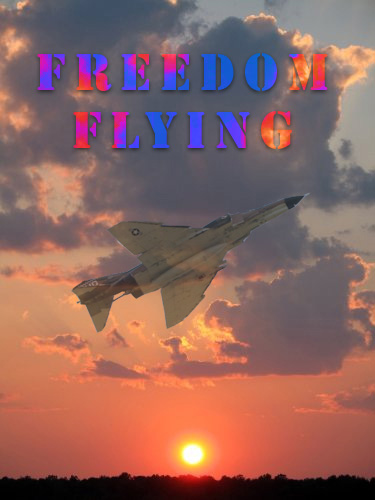
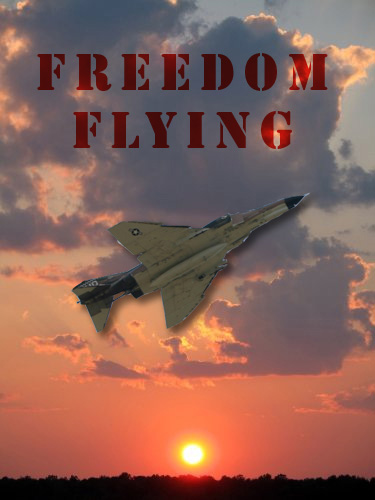
Lastly we learned how to use the Text Tool plus changing the Blend Modes
and also the Opacity as well as the Drop Shadow.
The Text Tool is a fun way to express yourself by adding this to your image
but it is also a creative way that you can do different styles to your text like
adding a Drop Shadow which gives depth, and then using the Blend Mode
shown in the text on your left and right. I also lowered the Opacity of the
plane on the left image to where you can see the cloud behind it.
Now the image on your right shows the text in a Blend Mode called Multiply
and the plane I gave a Drop Shadow to give depth.
Let me explain...
òThe Drop Shadow gives depth
òThe Blend Modes changes the look of the text, an image, paper, bucket fill,
etc...to creative ways besides having to have the original solid color...
meaning the original text color was red and by me using the Saturation Mode
(that was used on the text in the left image) it gave the text a Patriotic look
but with each image the Saturation Mode changes as well as the other Blend
Modes will change due to the background of the image.
òThe Opacity lowers allow you to lower the solid image or color to a
translucent image or color as you look at the plane in the left image.


I hope you enjoyed Lesson 5. Please feel free to contact me.
Web Layout Designed by ®AngelAD