Week 6 Lesson contains:
òWorking with...
òFlip Command
òLayer Mask
òHue / Saturation / Lightness
òRemove Image from Background and Place
onto another image and make it look as though the
tubed image was already included.
òRemove image from backrground place onto another backbround
lower the opacity, using eraser smooth edges of the tubed image
and add text with style and drop shadow.
òUsing the Extract Filter
òCompression Artifacts
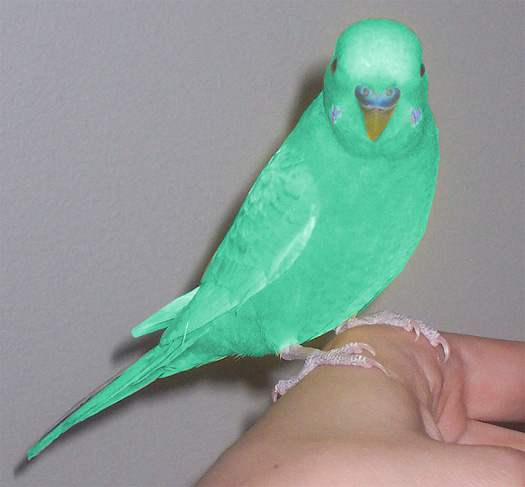
The pretty bird in the above image was created...
1 - Flipping the image for the image was upside down.
1 - Using a Polygonal Lasso Tool and then applying the Layer Mask...
What this does is it duplicates the bird and erases the background,
the eyes, and beak, so that when I colored the bird (for the original color
of the bird was yellow I was able to just colorize the feathers green
by using the Layers- Adjustments- Hue/Saturation & Lightness.
Remove Image from Background Using Extract Filter
and Place onto Another Image so that as if it Were One
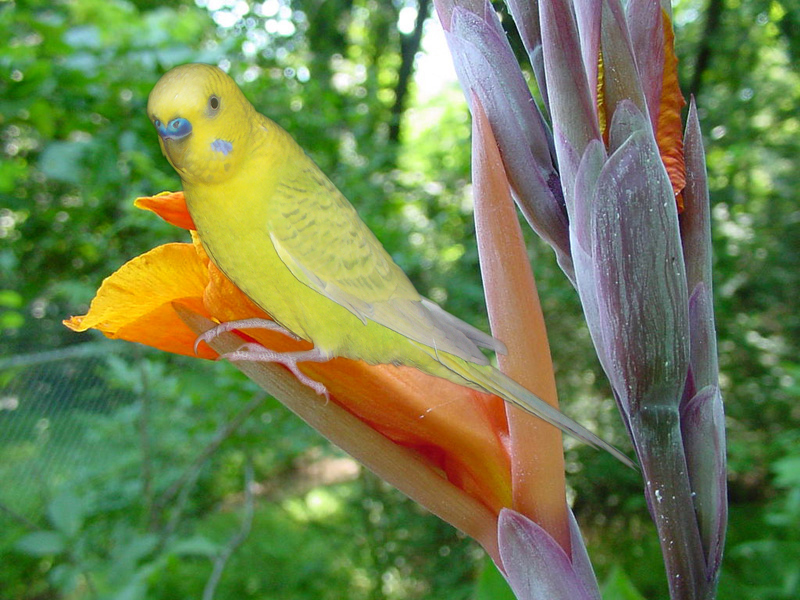
The Tropical Flower's Original Image did not have the bird
What I wanted to do was to create an image with another image
so that it would look as though the both images were one.
Here is how I created the bird onto the Tropical Background...
I first tubed my bird using the Polygonal Lasso Tool at 2px Feather
and when I completed the bird I Inversed and deleted the background.
Next I selected my magic wand for I found the bird's edges was to harsh
and I wanted to soften the edges so I used the feathering feature at 2px
and clicked on my delete button once and still I was not satisfied, so then
I decided to smooth out my image...after that I just resized the bird
to fit onto the flower so that it looked as if the bird was naturally sitting there.
Remove Image using the Extract Filter and Lower the Opacity
Apply a Drop Shadow, Text and Border
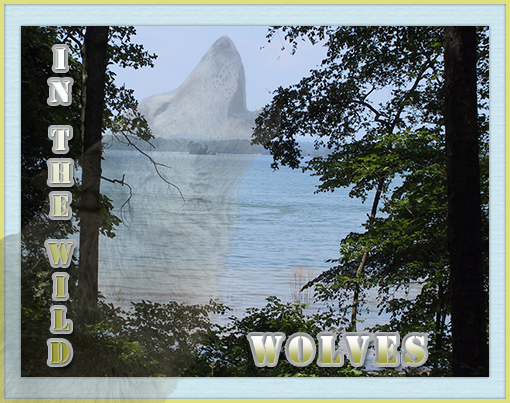
Looking at the above image you see there is a wolf that is transparent
to do this...
First we learned to use another technique to erase the background
of an image called the Extract Filter, then we copied and pasted
the wolf onto the background image where then we lowered the opacity,
but the edges of the wolf was too harsh and I wanted to make the edges
so that is smooth and barely seen and make is as part of the water,
so by taking the Eraser tool and lowering the harshness I was able
to soften the edges.
Next we learned how to apply text and giving it Style and a Drop shadow.
We also learned how to change the canvas size, resize the image,
arrange layers and to add a drop shadow to the layer, and lastly
giving it a border or frame.
The Extract Filter and Applying Filters

In this image first we duplicated the original background image, then we
used the Extract Filter (as explained in the above section) onto the duplicate
image and on the duplicated image we adjusted the levels to brighten it up
and resized the Extracted Flower.
Next I decided I wanted my Flower to pop-out I then went to my original
background image and gave it a few effects by applying a Fade Blur, then
giving an Artistic Effect I applied the Smudge Stick.
Lastly I wanted to give the flower more depth so I applied a Drop Shadow.
Compression Artifacts
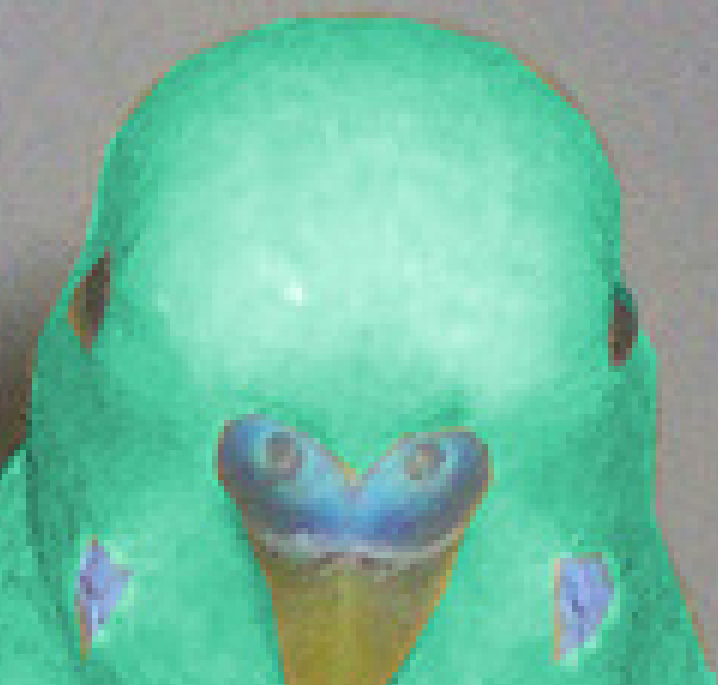
Looking at this image I have enlarged it to show you the artifact on the edges
after compression has been made to the image...meaning
the original image (not shown) is untouched and this image was
saved optimizing the image which reduces the file size to either put onto a
webpage so that the page easily loads or to use elsewhere such as
graphics to put in an email.


I hope you enjoyed the Last Lesson. Please feel free to contact me.
Web Layout Designed by ®AngelAD